MONOPRINTS
Techniques and Materials
Earlier this year I spent a couple of months in Ireland...... with 3,500 miles travelled you can imagine the wealth of reference I came home with. I kept a journal packed with drawings, photos and words about the folk met along the way and details of each days happenings, the weather, history, atmosphere and anecdotes. I find having all of this infomation helps when trying to recreate images when I get back to the studio. More details of the travels can be seen on Ramsgill Studio Facebook Page.
I decided to depict the landscape and coastal scenes in oils and the stone circles, ruined castles, skeleton boats and megalithic tombs in drawings in the form of monoprints. I've been looking forward to doing these since getting back.... drawing for me is inate, like improvisation, I let my hand take over, making marks and exploring the surface.
Monoprints by their very nature are immediate and spontaneous, they can be created in just a few minutes and are a one off. In their simplest form they are created by lying a thin piece of paper over an inked up surface and by applying pressure to the reverse of the paper an image is created. Their beauty is in the balance of the tones and the variety of mark making creating a quality of line that is not achievable by direct drawing. By working in reverse they can be a bit hit and miss but by experimenting and playing with different materials and mark making impliments you can take some of the 'miss' out of it!
Having said this, once the basics are mastered monoprints can be taken onto a different level by intoducing coloured inks, handmade papers and gold leaf. They can be quite planned and considered although the end result can still be a bit of a mystery. The following notes are my take on monoprints, the materials I use and how I go about making a fairly complex print.
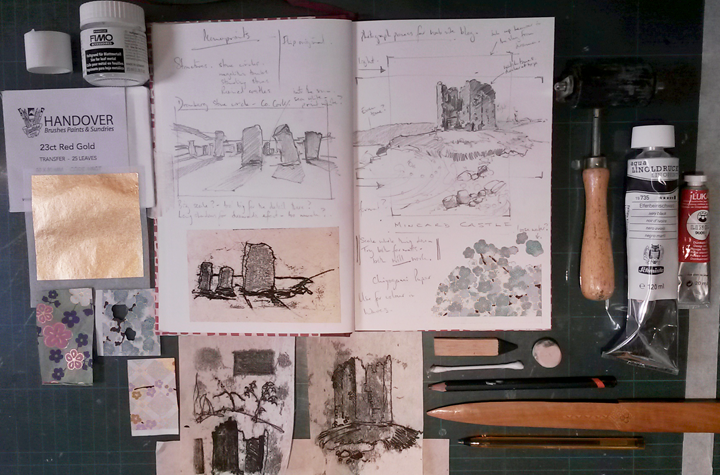
This photo shows a variety of mark making tools from a cotton bud for soft lines to a piece of balsa wood for square edged marks. I use Schmincke Aqua Linoprint inks, Japanese Gampi Vellum 32g and beautiful Chiyogami screen printed papers from Shepherds of London www.store.bookbinding.co.uk Handover gold leaf, and plexiglass as a plate. The thinner the paper the more responsive to pressure it is.... cheap newsprint works well, but some of the plant based Japanese papers are stunning once you gain confidence. I use Staedtler size for leaf metal for the gold leaf as it doeasn't seem to soak into the paper as much as proper size for gold leaf.
I tab the piece of paper onto the plexiglass with micropore tape, a thin medical paper tape which is less tacky than normal masking tape, so as not to tear the delicate paper. I plot out the area to be printed and mask round the edges with tape. Squeeze out a little ink at a time, you will be suprised how little you need to roll out a very thin film. Excess can be removed by gently lying a piece of tissue over the top.
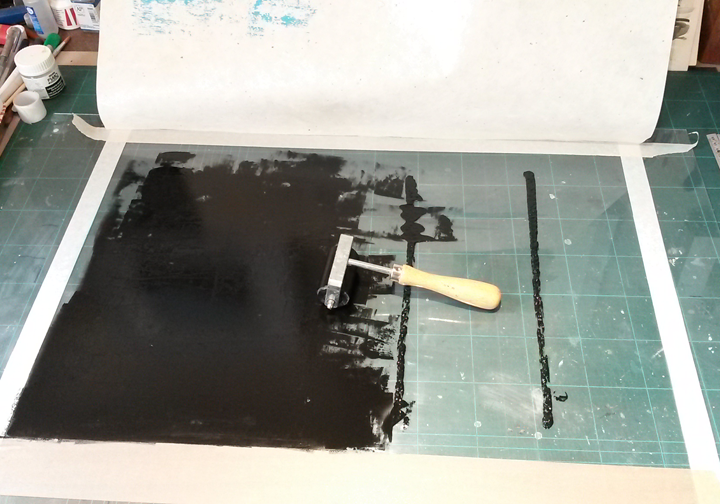
This photo shows the paper tabed at the top..... it alows you to flip the piece of paper up to check on progress. One of the hardest things to gauge is the amount of ink on the plate in relation to how much pressure is needed to get a mid tone coverage especially bearing in mind as soon as it is rolled out it starts to dry! By drawing crop lines on the plexiglass you can successfully re ink the plate if needed.
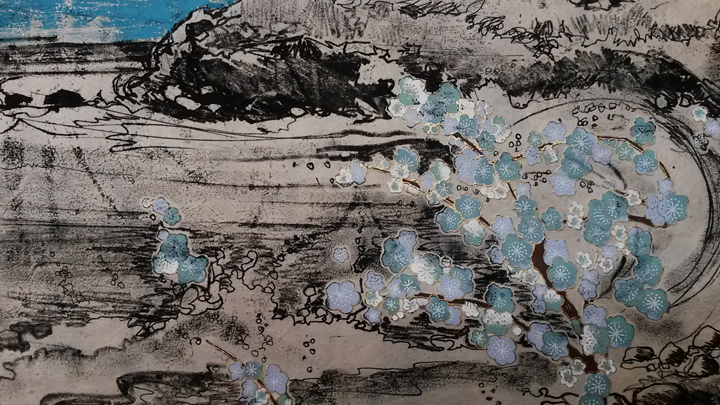
I started this piece by cutting out a blossom pattern from a gorgeous Chiyogami printed paper, taking hours but very effective. The patterend paper was stuck on the right side of the print to suggest the foam and spray of the waves on the beach. On a lightbox I traced around the position of the paper so I could incorporate it accurately into the print. With my reference picture flipped in reverse I loosely plotted out where the image was going to be, trying to leave as little to chance as possible. The photo below shows this stage although it's quite hard to see.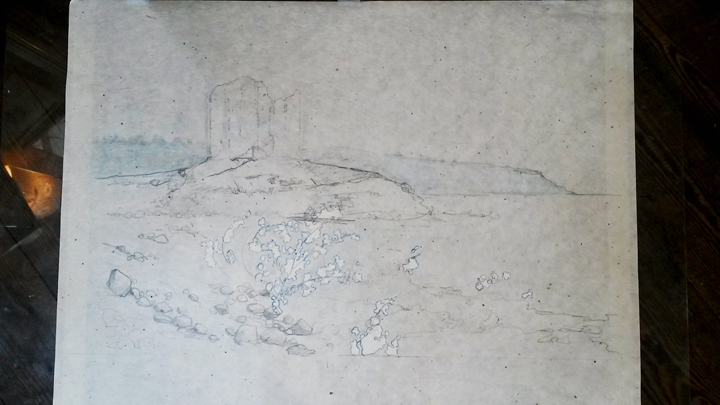
On this print I chose to print the background distant hill in turqoise in the hope that the colour would tie in with the colour in the patterned foreground paper. As it happened it didn't work very well! I then started with the sky area, applying pressure just with my hand to create a soft cloud like effect, being carefull to stop short of the castle so it appears to have a light halo around it. I continued down finishing with some detail in the stones and surface of the water. The photo below shows a detail of the finished image. The image as a whole was interesting although the focal point of the castle filled in a bit too much, loosing the detail in the brickwork.
The complete image can be seen under the monoprint section in 'New Work'.